Abstract:
Master the art of creating tender, flavorful oven-roasted brisket with essential techniques and tips.
- Select quality meat with visible marbling from the chest area, choosing between flat cuts (lean, uniform) or point cuts (fatty, tender)
- Season 12-24 hours ahead with a balanced dry rub including paprika, brown sugar, garlic, and spices for maximum flavor penetration
- Cook low and slow at 300-325°F in a sealed foil environment, allowing one hour 15 minutes per pound until reaching 195-205°F
- Rest before slicing for 20-30 minutes, then cut against the grain perpendicular to muscle fibers for optimal tenderness
- Serve with pan drippings alongside classic sides like coleslaw, baked beans, and cornbread for an authentic barbecue experience
Transforming a tough cut of beef into a tender, flavorful masterpiece is entirely possible when you master the art of oven-roasted brisket. This cooking method allows home cooks to achieve results that rival traditional smoking techniques, all within the controlled environment of a conventional oven. Whether you’re preparing a special holiday meal or simply craving that distinctive barbecue flavor, understanding the fundamentals of brisket preparation will elevate your cooking game significantly.
The secret lies in low and slow cooking, which breaks down the connective tissues and transforms this challenging cut into something extraordinary. Unlike quick-cooking methods that leave meat tough and chewy, the extended oven time at moderate temperatures allows the collagen to melt gradually, creating that sought-after fall-apart texture. With proper technique and patience, your kitchen can produce brisket that brings people back for seconds.
Understanding your cut and preparation essentials
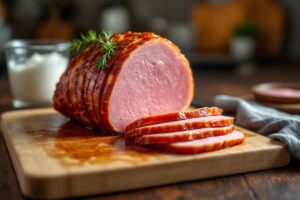
Beef brisket originates from the lower chest area of cattle, where constant muscle movement creates abundant connective tissue. This anatomical feature explains why brisket requires specific cooking approaches to achieve tenderness. The cut consists of two distinct sections : the flat or first cut, which presents uniform thickness with minimal fat, and the point or second cut, which contains higher fat content and delivers exceptional tenderness after proper cooking.
When selecting your brisket, look for pieces with visible marbling throughout the meat. These fat streaks act as natural basters during the cooking process, keeping the meat moist and adding depth of flavor. The flat cut, though leaner, still features a fat cap on top that should be trimmed to approximately one-quarter inch thickness. This layer protects the meat from drying while contributing richness to the final dish.
Preparation begins at least 12 to 24 hours before cooking. Pat the brisket dry with paper towels, then apply your chosen dry rub generously across all surfaces. A balanced spice blend typically includes paprika, brown sugar, garlic powder, onion powder, salt, black pepper, cumin, and cayenne pepper. Massage these seasonings into every crevice, ensuring complete coverage. Some cooks apply yellow mustard first as a binder, while others brush on liquid smoke for added complexity. Wrap the seasoned brisket tightly in foil or plastic wrap, refrigerate overnight, then remove it 30 to 60 minutes before cooking to reach room temperature.
Cooking techniques for perfect tenderness
Preheat your oven to temperatures between 300 and 325 degrees Fahrenheit. This moderate heat range facilitates the gradual breakdown of tough muscle fibers without causing the exterior to dry out. Position a rack inside a large roasting pan, then layer crisscrossed aluminum foil sheets long enough to loosely cover the brisket. Place the meat fat-side up on this foil bed, which allows drippings to collect below while maintaining moisture around the meat.
Many recipes incorporate liquids and aromatics at this stage. Adding four cups of beef broth to the pan creates steam that bathes the meat throughout cooking. Surround the brisket with sliced onions and garlic cloves, which soften during cooking and contribute to a flavorful sauce. Some cooks include water-rich vegetables like tomatoes and celery, which release moisture gradually while infusing the meat with additional flavors.
Cover the pan tightly with foil or a fitted lid, creating a sealed environment that traps moisture and prevents evaporation. This covering remains in place for the initial cooking phase, typically lasting three to five hours depending on brisket weight. The general guideline suggests one hour and 15 minutes per pound, though individual results vary based on meat characteristics and oven performance. Resist the temptation to peek during the first two hours, as opening the oven releases valuable heat and steam.
| Brisket Weight | Initial Cooking Time | Target Internal Temperature |
|---|---|---|
| 3 pounds | 3 hours | 180-185°F |
| 5 pounds | 5 hours | 180-185°F |
| 7 pounds | 6+ hours | 180-185°F |
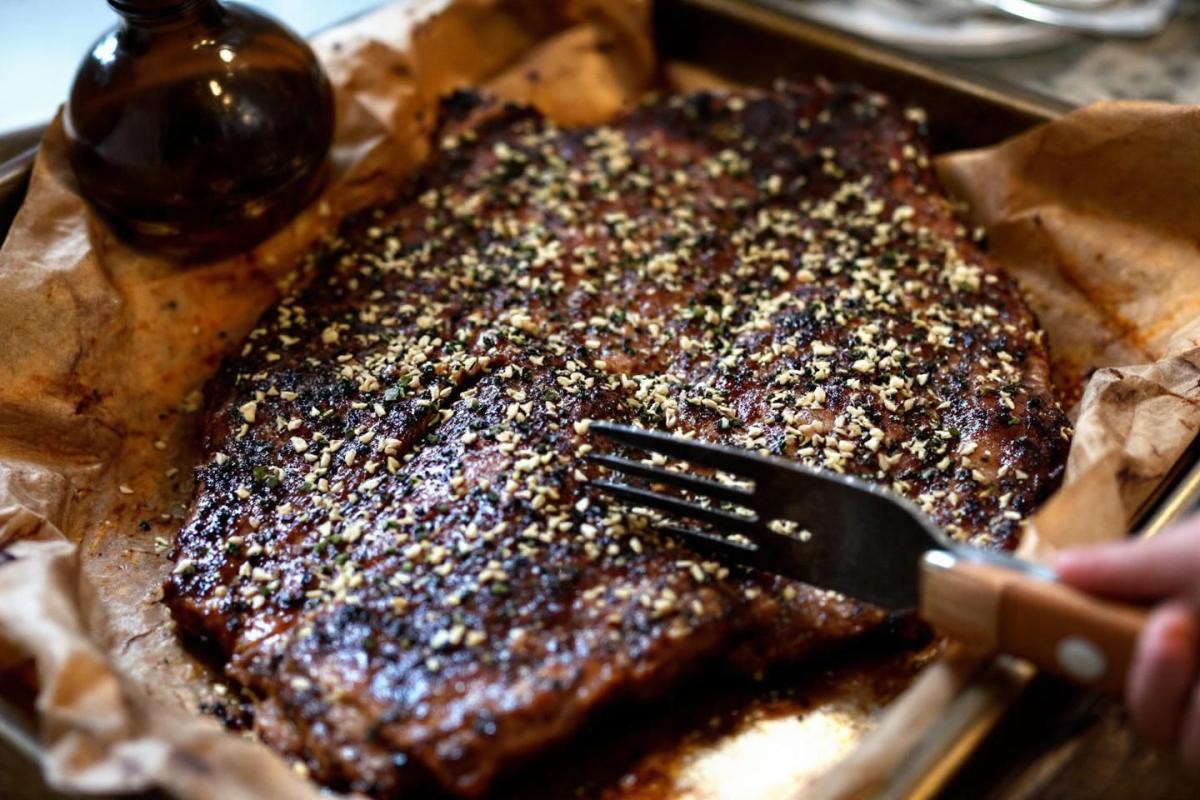
Temperature monitoring proves more reliable than time-based cooking. Insert a meat thermometer into the thickest portion to track internal progress. When the brisket reaches 180 to 185 degrees Fahrenheit, uncover the pan and continue cooking for another 30 to 45 minutes. This uncovered phase allows the exterior to develop a crusty, caramelized surface while the interior continues tenderizing. The brisket achieves optimal doneness between 195 and 205 degrees Fahrenheit, the range where collagen fully breaks down and fibers separate easily.
Finishing touches and serving strategies
Once your thermometer confirms the proper internal temperature, remove the brisket from the oven immediately. Transfer it to a cutting board and tent loosely with aluminum foil. This resting period, lasting at minimum 20 to 30 minutes, allows redistributing juices throughout the meat. Cutting too soon causes these precious liquids to escape onto the board, leaving you with dry, disappointing slices. Patient cooks are rewarded with succulent, flavorful meat that retains its moisture.
Slicing technique significantly impacts texture perception. Examine the meat carefully to identify the direction of muscle fibers, which run in parallel lines across the surface. Position your knife perpendicular to these fibers, cutting across the grain rather than parallel to it. This approach shortens the fiber strands in each slice, making them easier to chew and dramatically improving perceived tenderness. Slices cut with the grain feel stringy and tough regardless of proper cooking.
The pan drippings deserve attention as well. Skim excess fat from the accumulated liquid, then taste and adjust seasoning as needed. This flavorful sauce combines spice rub elements with natural meat juices, creating a complex accompaniment that enhances each bite. Some cooks strain the sauce for smooth consistency, while others prefer leaving aromatic vegetables intact. Serve the sliced brisket arranged on a platter with sauce drizzled over the top, or present it separately for individual preferences.
For serving portions, calculate approximately half a pound of uncooked brisket per person, which yields roughly six ounces after cooking and shrinkage. A five-pound brisket comfortably feeds ten people when accompanied by substantial sides. Classic pairings include :
- Creamy macaroni and cheese or baked variations
- Tangy coleslaw that cuts through rich meat flavors
- Traditional potato salad or crispy roasted potatoes
- Baked beans or pinto beans with aromatic seasonings
- Fresh cornbread or rustic sweet cornbread variations
Leftover brisket stores well when wrapped tightly in parchment paper followed by aluminum foil. Refrigerate for three to five days, or freeze for extended storage. Reheating benefits from low temperatures and added moisture—wrap slices in foil and warm at 300 degrees Fahrenheit for 15 to 20 minutes. Alternatively, transform leftovers into sandwiches piled high on toasted rolls, tacos with fresh toppings, or chopped additions to scrambled eggs and fried rice.