Abstract:
Master thick-cut pork chops with proper technique for restaurant-quality results at home every time.
- Select chops 1.25 to 2 inches thick for optimal moisture retention. Pat dry thoroughly before seasoning to enable proper browning and crust development.
- Sear two minutes per side in a sizzling hot skillet, then transfer to a 400-425°F oven. Calculate six minutes baking time per half-inch of thickness.
- Cook to 145°F internal temperature using an instant-read thermometer inserted in the thickest part. Rest five minutes before serving for juice redistribution.
- Avoid overcooking by removing chops immediately at target temperature. High-heat methods produce better results than low and slow techniques for these cuts.
Mastering the art of preparing juicy, tender thick-cut chops transforms an ordinary weeknight dinner into a restaurant-quality meal. The secret lies in understanding proper temperature control, selecting the right thickness, and applying proven cooking techniques that preserve moisture while developing a caramelized crust. Whether you prefer oven-roasting or combining stovetop searing with oven finishing, thick pork chops demand attention to timing and temperature to achieve optimal results without dryness.
These substantial cuts, typically measuring between one and two inches thick, require a different approach than their thinner counterparts. The challenge involves cooking the interior to safe temperature levels while preventing the exterior from overcooking. When executed correctly, thick chops deliver superior juiciness and flavor compared to thinner cuts that easily become tough and dry.
Selecting and preparing your meat properly
Begin by choosing chops that measure at least one inch thick, with 1.25 to 2 inches being ideal for achieving the best texture and moisture retention. Both boneless and bone-in varieties work well with these methods, though bone-in cuts tend to retain more moisture during cooking as the bone acts as a heat conductor. Standard thick cuts typically weigh between six and eight ounces each, providing a satisfying portion for one person.
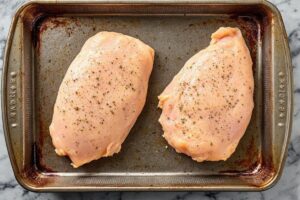
Before seasoning, pat each chop completely dry using paper towels to remove surface moisture. This critical step allows seasonings to adhere properly and helps achieve better browning during cooking. Consider lightly pounding the meat between plastic wrap with four to five gentle strikes using a rolling pin or meat mallet. This tenderizing technique breaks up connective fibers without flattening the chops, improving final tenderness.
For seasoning, multiple effective approaches exist. A popular spice combination includes brown sugar, paprika, garlic powder, onion powder, salt, and black pepper. The brown sugar helps create caramelization during cooking, developing rich flavor and color. Alternatively, combine kosher salt, black pepper, paprika, and garlic powder for a simpler profile. Rub chops with olive oil first, then apply seasoning liberally to both sides and edges, ensuring complete coverage.
Marinating offers another flavor-enhancing option. Combine steak marinade with olive oil and refrigerate the meat for at least one hour, up to twenty-four hours. This technique tenderizes the protein while infusing deeper flavor throughout the cut. After marinating, pat the surface dry again before cooking to ensure proper browning.
Cooking methods that guarantee tender results
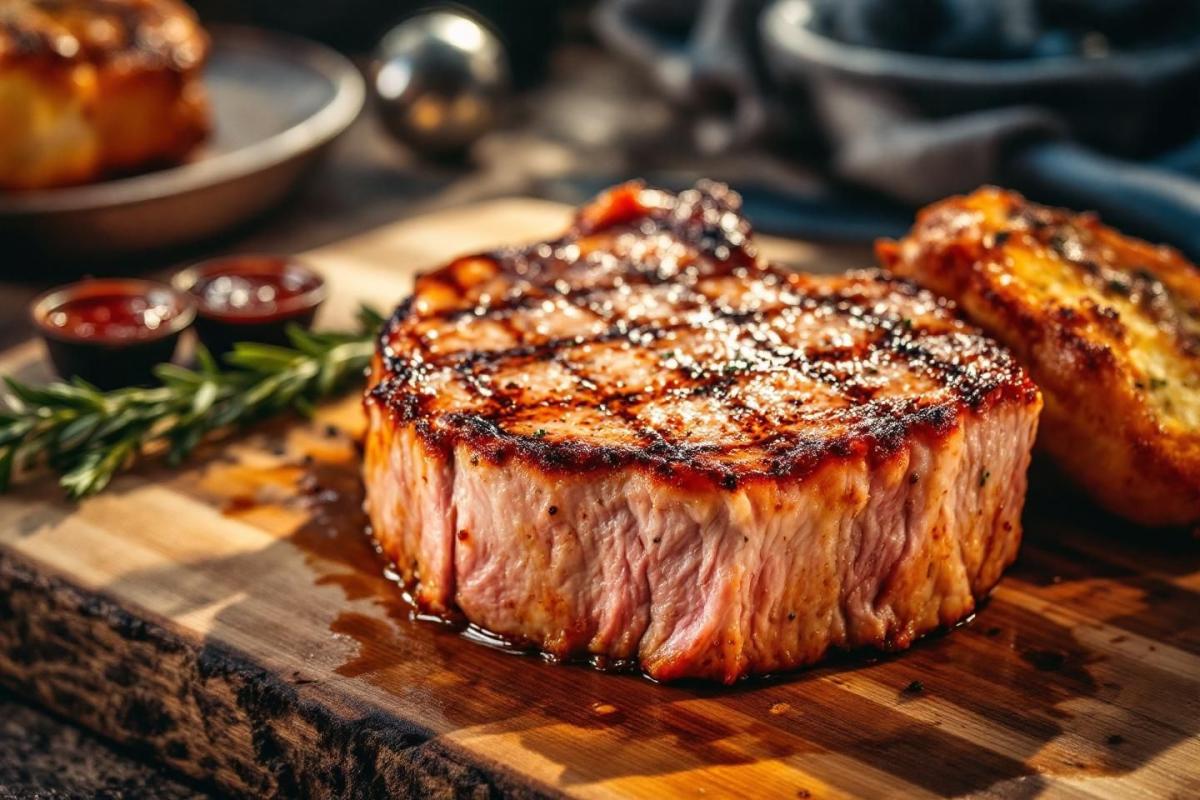
The most reliable technique combines stovetop searing with oven finishing. Preheat your oven to 400-425°F while heating an oven-safe skillet over high heat for approximately three minutes. The pan should become sizzling hot—water flicked from your fingers should bounce off the surface. Add one tablespoon olive oil or spray with cooking spray, then sear chops for exactly two minutes per side without moving them. Avoid longer searing times as this can overcook the exterior before the interior reaches proper temperature.
Transfer the entire skillet to the preheated oven and bake for eight to ten minutes, then flip and continue baking another five to ten minutes. Calculate approximately six minutes per half-inch of thickness as a general guideline. A one-inch chop needs roughly twelve minutes total oven time, while slightly thicker cuts may require fourteen minutes. Check the internal temperature after twelve minutes and monitor closely, as these cuts cook rapidly in the final minutes.
For an oven-only approach, line a rimmed baking sheet with parchment paper or aluminum foil and place seasoned chops on the prepared surface. Bake at 400-425°F for twelve to fifteen minutes depending on thickness, or until reaching 140°F internally. Switch the oven to broil and broil for one to two minutes until nicely browned and the temperature reaches at least 145°F. Keep chops on the middle rack when broiling with parchment paper, or remove parchment if your broiler runs particularly hot.
A low-temperature finishing method provides another option. Heat your oven to 180°F and sear the chop in a hot skillet for exactly one minute on the first side only. Flip and immediately transfer the pan to the oven, cooking for approximately twenty-five minutes until reaching the target temperature. Similar techniques work for other meats; for instance, learning how to cook a brisket in the oven also requires understanding temperature control and timing.
| Thickness | Sear Time Per Side | Oven Time at 425°F | Total Cooking Time |
|---|---|---|---|
| 1 inch | 2 minutes | 12 minutes | 16 minutes |
| 1.25 inches | 2 minutes | 14-15 minutes | 18-19 minutes |
| 1.5 inches | 2 minutes | 16-18 minutes | 20-22 minutes |
| 2 inches | 2 minutes | 18-20 minutes | 22-24 minutes |
Temperature guidelines and resting protocols
According to USDA guidelines, pork should reach an internal temperature of at least 145°F followed by a mandatory three-minute rest period for safe consumption. The meat can appear slightly pink at this temperature, which represents medium doneness and remains perfectly safe to eat. Use an instant-read meat thermometer to accurately check internal temperature, inserting it into the thickest part of the chop without touching bone.
After removing from the oven, let chops rest for five minutes before serving. This resting period allows the internal temperature to rise an additional five degrees through carryover cooking and lets juices redistribute throughout the muscle fibers. Without this crucial step, juices escape when you cut into the meat, resulting in dry texture. Cover loosely with aluminum foil during rest if desired, though this isn’t strictly necessary.
Avoiding overcooking represents the primary factor in preventing dry, tough results. Remove from heat as soon as reaching 145°F rather than cooking to higher temperatures. Baking at high temperature (400-425°F) for shorter periods produces better results than low and slow methods, which tend to dry out the exterior before the interior cooks properly. Modern air fryers also work well for smaller cuts; check out guidance on how long to cook pork chops in an air fryer for alternative cooking methods.
Tips for serving and storage success
Pair your perfectly cooked chops with complementary sides that enhance the meal without overwhelming the star protein. Roasted vegetables work particularly well, including asparagus with Parmesan, Brussels sprouts, or honey-glazed carrots. For a complete one-pan meal, add vegetables to the same baking sheet with timing adjustments : start potatoes or carrots ten minutes before adding chops, broccoli or Brussels sprouts five minutes before, and green beans simultaneously with the meat.
Store leftover chops in an airtight container in the refrigerator for three to four days. Reheat gently to prevent drying by microwaving covered at fifty percent power, starting with thirty seconds per chop per side and continuing until heated through. Leftover chops make excellent sandwiches or can be sliced and added to salads for quick lunches.
Key success factors include :
- Using thick-cut chops of at least one inch to prevent rapid moisture loss
- Not moving chops during searing to ensure proper crust formation
- Monitoring temperature closely toward the end as cooking accelerates
- Allowing proper resting time before cutting into the meat
- Choosing bone-in cuts when possible for enhanced moisture retention