Abstract:
Master the art of cooking precooked ham with proper techniques for moisture and flavor.
- Low and slow is essential : Cook at 275°F for 12-15 minutes per pound, reaching an internal temperature of 140-145°F to avoid drying out the meat.
- Prepare properly by placing ham cut-side-down in foil-lined pan, covering completely to retain moisture throughout the cooking process.
- Apply glaze during final stages only : Brush on sweet-savory mixture, then increase temperature to 425°F for 10 minutes to caramelize beautifully.
- Store leftovers wrapped tightly in refrigerator for 5-7 days or freeze for 1-2 months ; use for soups, sandwiches, casseroles, and stock.
Cooking a precooked ham doesn’t have to be intimidating. Whether you’re preparing dinner for a holiday gathering or simply looking for a delicious protein option, understanding the proper techniques will ensure your ham turns out moist, flavorful, and perfectly warmed. The key lies in balancing temperature, timing, and moisture retention to avoid the common pitfall of drying out this already-cooked meat. With the right approach, you’ll transform a simple store-bought ham into a centerpiece worthy of any celebration.
Selecting and preparing your ham
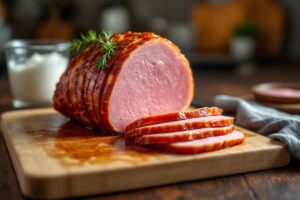
When shopping for ham, you’ll typically encounter fully cooked options at your local grocery store, often labeled as “city ham.” These hams undergo curing in a salt water solution with seasonings before being smoked, cooked, and packaged. The beauty of these products is their versatility—they can be served cold, at room temperature, or reheated to enhance flavor and texture. Spiral-cut varieties offer exceptional convenience since they’re pre-sliced, making serving effortless.
Before cooking begins, proper preparation sets the stage for success. Remove your ham from the refrigerator approximately 4.5 hours before you plan to serve it, allowing it to stand at room temperature for 30 minutes before baking. This gradual warming prevents thermal shock and promotes even heating throughout. Place the ham cut-side-down or face-down in a roasting pan lined with heavy-duty aluminum foil. Cover the ham completely with additional foil to retain moisture during the cooking process. This protective barrier prevents the surface from drying while the interior warms to the ideal temperature.
Understanding whether your ham is boneless or bone-in affects cooking time and carving technique. Bone-in options generally provide superior flavor due to the bone’s contribution during cooking, though they require slightly more effort when serving. Look for indicators like “cured,” “smoked,” and “baked” on the packaging to confirm your ham is indeed precooked and safe to eat without additional cooking—the heating process simply enhances taste and presentation.
Mastering cooking time and temperature
The secret to perfectly cooked precooked ham lies in using low, gentle heat over an extended period. Set your oven to 275°F and plan for approximately 12-15 minutes per pound of ham. For a typical 10-pound bone-in ham, this translates to roughly 2 to 2.5 hours of cooking time. This low-and-slow method stands in stark contrast to traditional high-heat approaches that often result in dried-out meat.
| Ham Weight | Cooking Time at 275°F | Target Temperature |
|---|---|---|
| 6-8 pounds | 1.5-2 hours | 140-145°F |
| 8-10 pounds | 2-2.5 hours | 140-145°F |
| 10-14 pounds | 2.5-3.5 hours | 140-145°F |
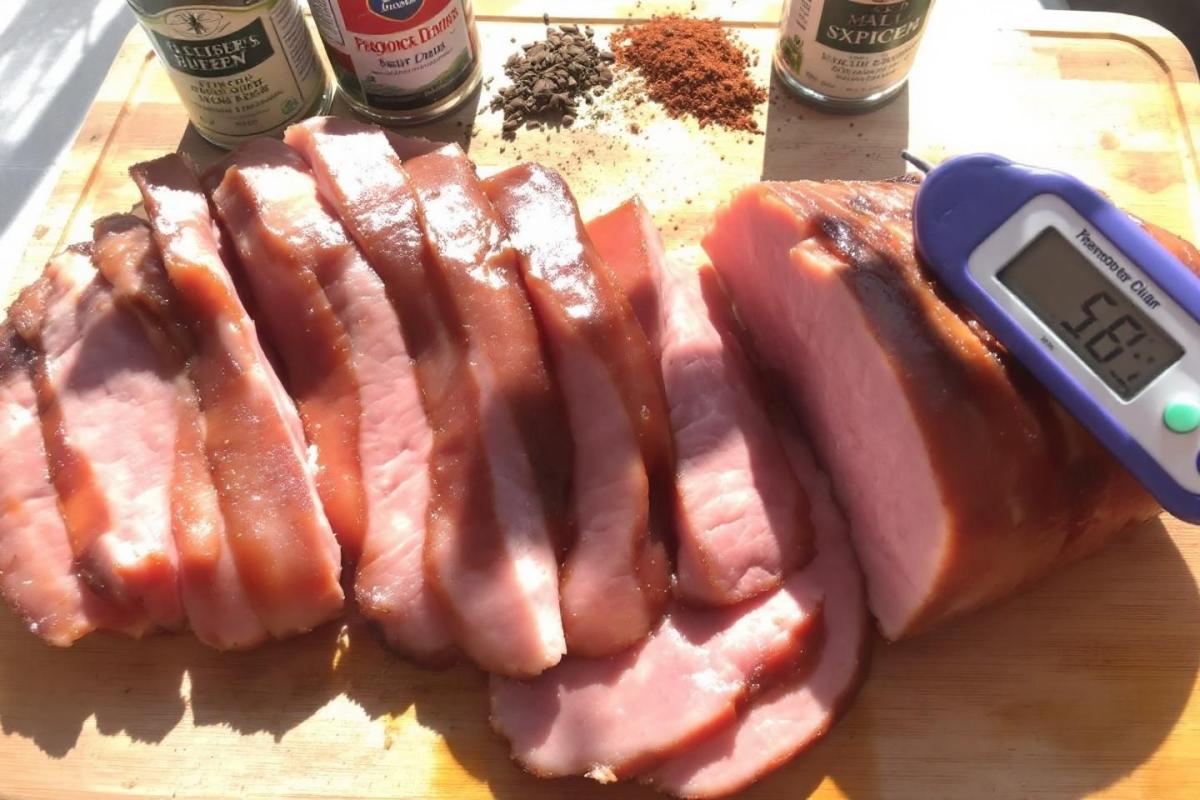
Using a meat thermometer is essential when cooking large cuts of meat. Insert it into the thickest portion of the ham, avoiding contact with the bone, and look for an internal temperature between 140°F and 145°F. This temperature ensures the ham is thoroughly heated without overcooking. For spiral-cut varieties, reduce cooking time slightly to about 10 minutes per pound, as the pre-slicing allows heat to penetrate more efficiently.
During the cooking process, baste your ham one to two times with the accumulated juices in the pan. For spiral-cut hams, gently separate the slices while basting to ensure moisture reaches every layer. This technique preserves the ham’s natural juices and prevents the dreaded dry texture that results from excessive heat exposure. Keep the foil cover in place throughout most of the cooking time, only removing it during the final stages when applying glaze.
Creating and applying the perfect glaze
A well-crafted glaze transforms an ordinary ham into something extraordinary. The classic approach combines sweet and savory elements to complement the ham’s natural saltiness. A simple brown sugar glaze requires just four ingredients : half a cup of packed brown sugar, a quarter cup of real maple syrup or honey, two tablespoons of yellow or dijon mustard, and two cloves of minced garlic. Combine these ingredients in a small saucepan over medium heat, stirring until the sugar melts and the mixture becomes syrupy—typically one to two minutes.
Timing is crucial when glazing your ham. Rather than basting with glaze throughout the cooking process, which can cause burning and excessive sweetness, save the glaze for finishing. Once your ham has nearly reached the target temperature after its slow cooking phase, remove the foil covering and brush the glaze generously over the entire surface. For pre-sliced hams, work the glaze between slices to maximize flavor penetration in all the nooks and crannies.
After applying the glaze, increase oven temperature to 425°F for the final 10 minutes of cooking. This higher heat caramelizes the sugars in the glaze, creating a beautiful glossy coating with enhanced flavor complexity. Monitor the ham closely during this stage—if it begins to darken too quickly, cover loosely with foil to prevent burning. The balance between sweetness and complementary flavors like citrus, herbs, or spices creates a sophisticated finish. Just as cooking turkey breast benefits from proper glazing techniques, ham achieves its best presentation when the glaze is properly caramelized.
Storing and maximizing leftover ham
After your meal, proper storage ensures your leftover ham remains safe and delicious for future use. Allow the ham to cool completely to room temperature before storing—never place hot meat directly in the refrigerator, as this raises internal temperatures and creates food safety risks. Wrap leftover ham slices tightly in aluminum foil or plastic wrap, then place them in an airtight container or resealable plastic bag. When stored this way, ham lasts 5 to 7 days in the refrigerator.
For longer storage, freezing offers an excellent solution. Cut the ham from the bone, wrap individual slices in plastic wrap to hold in moisture, then stack them in a resealable freezer bag. Properly frozen ham maintains its flavor for 1 to 2 months, though it can remain safe for up to one year when stored correctly. Similar to how you might plan ahead when learning how long to cook bone-in turkey breast in the oven, planning for ham leftovers maximizes your investment.
The versatility of leftover ham opens numerous culinary possibilities :
- Dice it for ham salad perfect for brunch gatherings
- Add chunks to quiches and breakfast casseroles for protein-rich morning meals
- Stir into ham and potato soup for comforting cold-weather dinners
- Create sandwiches ranging from simple ham and cheese to elaborate Monte Cristos
- Use thinly sliced portions as filling for chicken cordon bleu
Don’t discard the ham bone—it creates wonderfully flavorful stock when simmered with vegetables and aromatics. Add it when cooking beans or lentils to enhance their depth and richness. The bone contributes collagen and marrow that transform simple legumes into restaurant-quality dishes. Once ice crystals begin forming on frozen ham, it’s time to use it or discard it, as freezer burn compromises both texture and taste.